Table of Contents
How to Reserve a Room using Outlook
Using Outlook Desktop Client

- Start the Outlook application, and open the Calendar view by clicking the calendar icon in the lower-left corner of the screen.
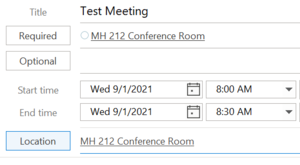
- When creating a meeting, click the Location button to display a list of rooms that may be scheduled on campus.
- Double-click on a room to add it, and then click OK.
- Use the Scheduling Assistant to view free/busy information for your meeting attendees and selected room(s). Note: You may add multiple rooms to a meeting to compare scheduling availability against meeting attendees. Be sure to remove extra rooms from the meeting before sending the invitation.
 When you send your meeting invitation, most rooms will automatically send a meeting acceptance if the room is available. Some rooms reservations may require an approval before the booking is accepted.
- If you cancel a meeting, be sure to cancel the meeting in Outlook, which will automatically cancel the room reservation, and make the room available for others to schedule.
Using Outlook Online Web Client
- Open a web browser and go to Outlook Online calendar (https://outlook.office.com/calendar/)
- When creating a meeting, click in the field labeled Search for a room or location, and begin typing the name of the room(s) you wish to include. Select each room to add it to the rooms list for the meeting.
 Use the Scheduling Assistant to view free/busy information for your meeting attendees and selected room(s). Note: You may add multiple rooms to a meeting to compare scheduling availability against meeting attendees. Be sure to remove extra rooms from the meeting before sending the invitation.
- When you send your meeting invitation, most rooms will automatically send a meeting acceptance if the room is available. Some rooms reservations may require an approval before the booking is accepted.
- If you cancel a meeting, be sure to cancel the meeting in Outlook, which will automatically cancel the room reservation, and make the room available for others to schedule.