This is an old revision of the document!
Adding a Windows 7 Network Printer
- Select Add a Printer from the top of the window
- Select Add a network, wireless or Bluetooth printer
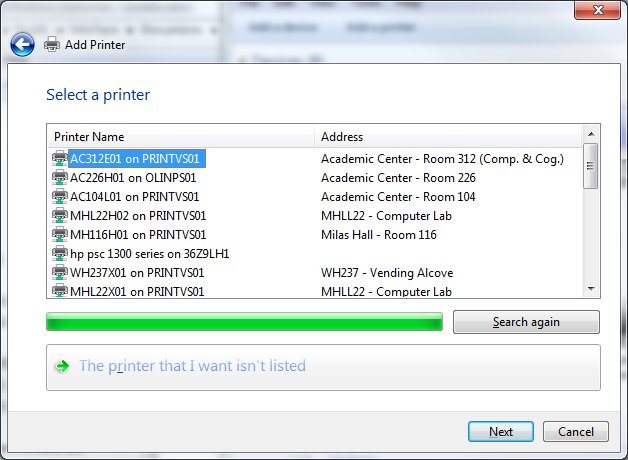
- Select your printer from the list
- Click on Printer Name in title bar to sort printers alphabetically
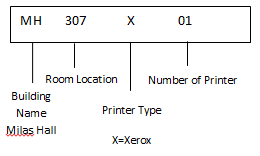
- Check label on printer for appropriate printer name
- All printers on campus follow this established naming convention.
- A list of all campus printers can be found on the IT Web Site
http://it.olin.edu/documents/PrintingScanning/200110211_Printer_Locations.pdf
- If the printer you want is not listed select The printer that I want isn’t listed
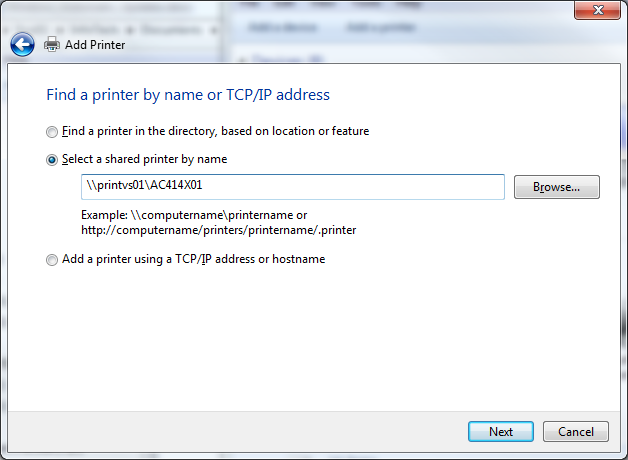
- Enter in the printer name you wish to add in the format \\printvs01\printername and select next
- Select Finish


