


This is an old revision of the document!
802.1x Networks in Windows 8 -- UNDER CONSTRUCTION
This article currently under construction
This document will guide you through connecting to the new 802.1x wireless profiles in Windows 8. This process is slightly different than in previous versions of Windows due to the changes in accessing certain network settings in Windows 8.
- Open the Network and Sharing Center (in Control Panel or through the network icon in the system tray) and click Set up a new connection or network in the center of the window.

- Choose Manually connect to a wireless network and click Next
- Enter the network name (
OLIN_XXwhereXXis the building code) - Select WPA2-Enterprise security, AES Encryption, then click Next
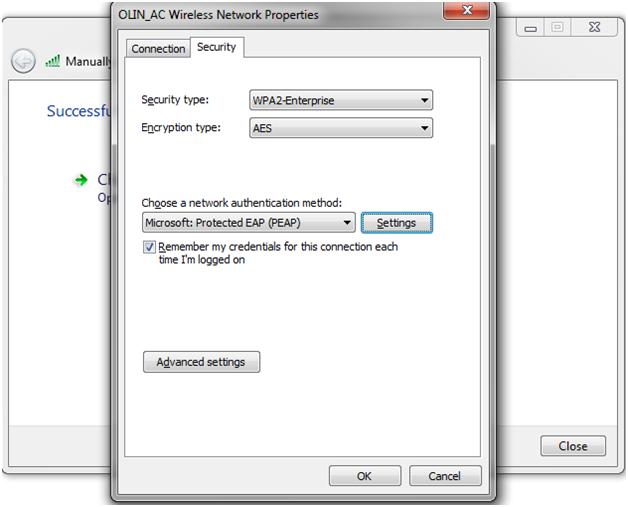
- Click the link to Change connection settings
- Under the Security tab, click the Settings button next to the Network Authentication Method
- Uncheck the top check box next to Validate Server Certificate and check the bottom check box next to Enable Identity Privacy and enter a name (such as yours).
- Click Configure and uncheck the box to use your Windows logon name and password.
- Click OK, then click Advanced Settings on the main Security Tab.
- Check the box to Specify authentication method, and select User authentication from the combo box
- Click Save Credentials (if you want them saved) and enter your username (as
<username>@olin.edu, notolin.edu\<username>) and domain password - Click OK twice then Close


| OLIN_AC | Academic Center |
|---|---|
| OLIN_MH | Milas Hall |
| OLIN_CC | Campus Center |
| OLIN_EH | East Hall dorms |
| OLIN_WH | West Hall dorms |