


This is an old revision of the document!
Adding a Windows Network Printer
- From the taskbar Click on Start→Settings→Printers and Faxes
- Click on Add a Printer from left column
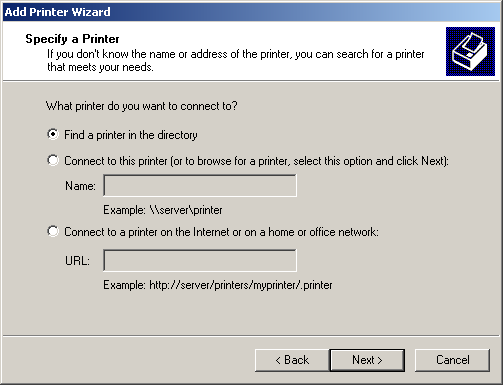
- Select a network printer and click next
- Select Find a printer in the directory and click next
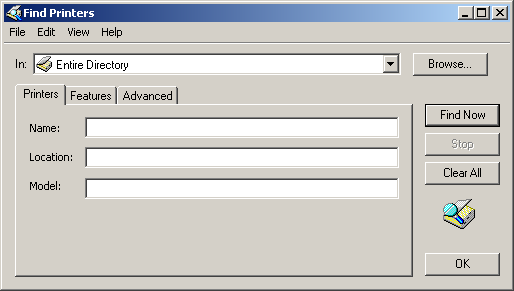
- Select Entire Directory and click Find Now
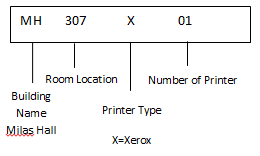
- Please Note: All printers on campus follow this established naming convention.
- Double click on the printer you wish to add.
- Next you are asked if you wish this printer to be your default, select Yes or No, click on Next.
- Click on Finish


