


Table of Contents
Solidworks Project Data Management (PDM) Instructions
Installing PDM if you have Solidworks 2021 but want to get to PDM03:
Navigate to the network share in FSVS01 from which Solidworks is downloaded.
- PDM location for the 2019 version.:
\\\\fsvs01\applications\public\netapps\solidworks\2023\swpdmclient
![]() If you do not have Solidworks installed, please refer to the main installation article.
If you do not have Solidworks installed, please refer to the main installation article.
- Run the file called
SOLIDWORKS PDM Client- You may have to copy the folder to your local drive - Once the installation is finished, follow the instructions in the Logging into PDM server section below.
Once PDM is installed, run the View Setup program.
At the page Select Archived Servers, if no server populates, select Add…
- Server name: PDM03
- Port: 3030
- Select Next, and then check the box next to PDM.
- Complete the installation.
Logging into the PDM server:
- Open Solidworks
- Under Tools → Add-ins, make sure both boxes are checked next to the PDM client. If you don’t see this line, see the Installing PDM if you have Solidworks Section.
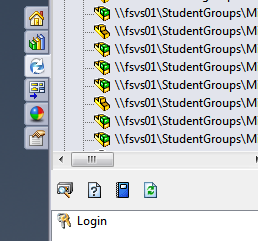
- Close out of Add-Ins and click on the File Explorer/PDM menu tab on the right side of the screen.
- Now, double click on the Login icon.
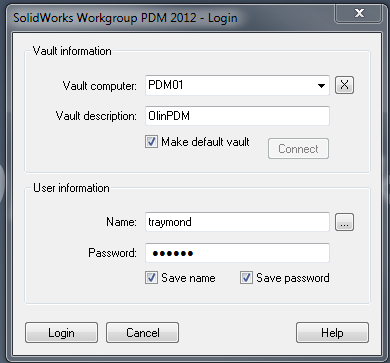
- Fill out the login portal as shown.
- Now, you are logged into the Vault. You should see a menu open up showing some projects. If a project is grayed out, you do not have access to it.
Opening/Checking out a File
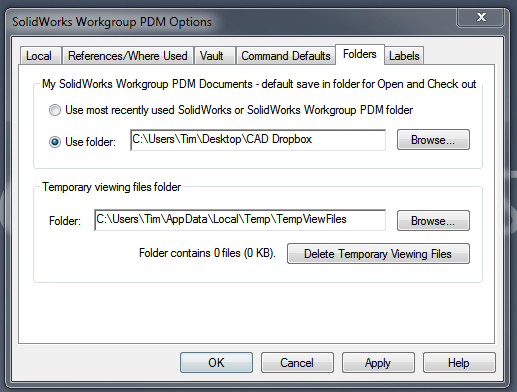
- First, right click on My Vault in the vault navigation tree.
- Select Solidworks Workgroup PDM options.
- Make sure you define a folder to download models to. Any time you download a model from the PDM server, it will live in this folder. Also, you can change your password under the Vault Tab.
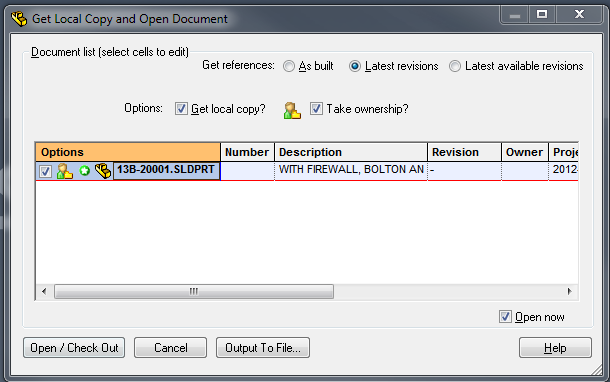
- To check out a file, open the Vault Navigation Pane and find the part you want to open. You can either view the part, or download it to work on it.
- Once you find the file, right click and hit Open/Check out Document.
- If you are intending on modifying the part (if you are changing it or making a revision), make sure you take ownership of the file.
- When you hit Open/Check Out, you will download the file from the server to the folder specified above.
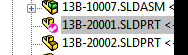
- Now, in the Navigation Tree, you should see a big pink check mark next to the part. This checkmark indicates ownership. You now own the part and no one else can upload a new version of it so long as you retain ownership.
- If you just want to view the file, don’t select the take ownership option, and you will just download the file. It will open as read-only.
Uploading a Revision or New Model
- Open the model/revision you want to upload.
- In the Vault Navigation Panel, right click on the project folder you want to upload to. If the file is a new version of a part already in the vault, it will upload to the same project that the older revision is in.
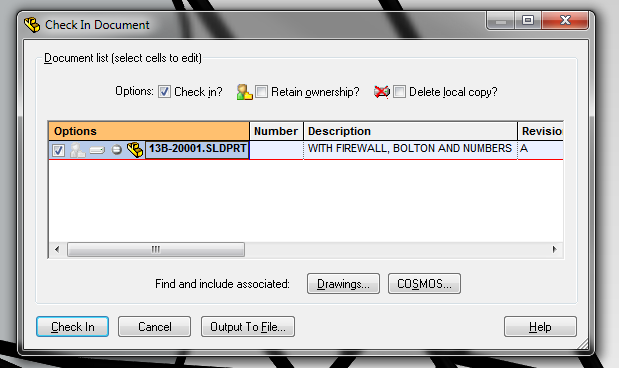
- Select Check In active document. Note that you can also check in from disk, but as it is easier to upload incorrectly when the model is not open on screen. Best practices suggest always opening the file first.
- If you want the file to be removed from your local file, select Delete Local Copy. Make sure you always delete vaulted files off your computer, as others may change the file and if you go to check it out again, you could accidentally work on the wrong file.
- Next, check the part in. If you want to include detail drawings, select that option and choose associated drawings.
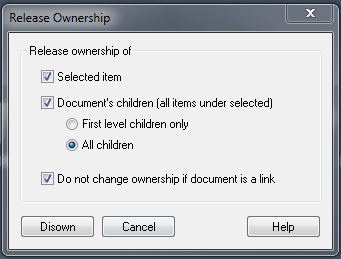
- Right click on the file you just checked in on the Navigation Panel (it’ll have a pink check mark on it). Select Release ownership, and make sure you disown the file’s children (parts in the assembly) as well.
- Make sure to double check the project that you are writing the file to.
- If you end up not needing to upload a new revision of the part, simply find the part in the Navigation Panel, right click, and select release ownership. The pink check mark should disappear.
Best Practices
- Never retain ownership of files you aren’t working on. Doing so means others can’t make changes. Periodically check the navigation panel (visually, or you can search by owner) for files that you own, and release ownership if you are not actively working with a part.
- To clarify, if you take ownership of a part, but then decide the changes don't need to happen, release it. This doesn't mean release the part every time you close it in Solidworks. Keep it as long as you need it, but once you don’t, release it.
- Delete local copies as duplicate part files are problematic.
- If you are making a change to a part/assembly which is a component in an assembly, open the next level up to make sure no mates were broken in the process. If they were, take ownership and fix the mates.
- Do not check broken CAD into the vault.
- Any new part/assembly should have an accompanying drawing.
Access
If you require access to a particular project or need some other kind of access change, please email helpdesk@olin.edu. If you are not the leader of said project, please have the leader email in to request access for you. The Heldpesk will not make any access changes without the appropriate vetting.