


Table of Contents
Ivanti Secure Access VPN Client Installation
(Formerly known as Pulse Secure VPN Client.)
Upgrading the Ivanti Secure Access VPN Client
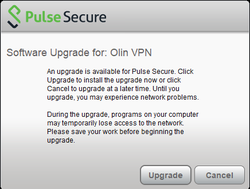 In many cases, your VPN client will be automatically updated when you connect to the Olin VPN server. If you are prompted to allow your client to be upgraded when you connect, please allow the upgrade to take place.
If the Olin IT Help Desk recommends that you do a manual upgrade of your Ivanti Secure Access VPN Client, simply follow the instructions below for a clean install. You are not required to uninstall the previous version first.
Download the Ivanti Secure Access VPN Client Installer
Please download the appropriate installer for your computer system. These links are restricted to the Olin College community, and you may be prompted to authenticate with your Olin login credentials.
Windows Client Installation
- Use a web browser to download the installer.
- The installed file should save in your Downloads folder.
- Open your Downloads folder and double-click the installer.
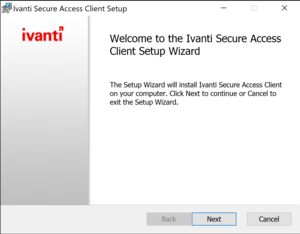
- At the screen: Welcome to the Ivanti Secure Access Client Setup Wizard, click Next.
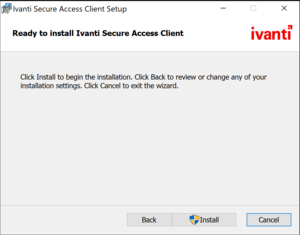
- At the screen: Ready to install Ivanti Secure Access Client, click Install.
- You may be prompted by Windows to allow the installer to make changes to your computer. Click Allow.
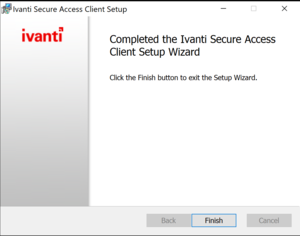
- When the installer is Completed, click Finish.
- Continue to Configure the VPN Client
MacOS Client Installation
- Use a web browser to download the installer.
- The installer file should save on your Desktop.
- Double-click the installer and then double-click PulseSecure.pkg
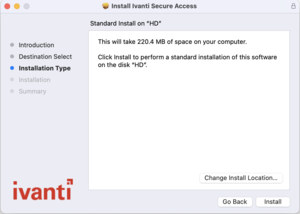
- Click Continue and then Install
- When prompted, enter in your local Mac password (not network credentials).
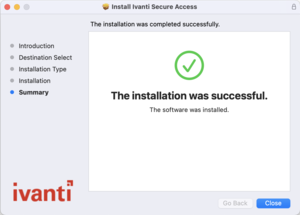
- Wait for the installation to complete, then click Close.
- Click the Ivanti Secure Access VPN Client icon in the top right of your screen (near the clock).
- Select Open Pulse Secure.
- Continue to Configure the VPN Client
Linux Client Installation
Ubuntu
- In Ubuntu 22.04, use a web browser to download the installer.
- Save the file to your Downloads folder.
- Open a Terminal window by selecting the Ctrl-Alt + T key.
- In the Terminal Window, cd to your Downloads directory.

cd Downloads
- Run the following commands within the Terminal window to complete the installation. You will be prompted for your Ubuntu login password once.
sudo apt install ./ps-pulse-linux-22.2r1.0-b1295-64bit-installer.deb
cd /opt/pulsesecure/bin
sudo ./setup_cef.sh install
- The Pulse Secure icon will be visible by pressing the Super-Key + A.
- The super-key is also known as the Windows Key.
- Click on the Pulse Secure app to launch it.
- To create a connection, click the plus sign.
- Enter a name for the connection, such as Olin College.
- Type in vpn.olin.edu for the Server in the URL field and click Add.
- Click Connect on your newly created connection.
- You may receive a certificate message, if so, click on the ok button.
- You will then see a second window open that will prompt you for your olin.edu network Username and Password
- When logged in, the Connect button will turn to Disconnect. To close the connection, click on the Disconnect button.